Wednesday, December 17, 2014

Have you seen your guinea pig's Christmas list?


In addition to Christmas lists, guinea pigs can also make snowflakes!


See other guinea pig funnies here.

The Adventures of Guinea Pigs & Vermicomposting Worms


Guinea pigs + red wigglers = a great team!
I have worms that help me with guinea pig maintenance.  Can you believe it?  It's true, and they are a great team!
Red wigglers
I am always on the lookout for more ways to live an organic and "green" lifestyle.  I have been adventuring in vermicomposting off and on for a couple years now.   We have an outdoor compost full of worms, however in the winter, it's sooooo cold!  I started with the idea of a nice Worm Factory kitchen composter for in the house, at least seasonally.   This is working wonders for all the spare veggie scraps, junk mail, cardboard tubes, etc. that we frequently have around the house - and we have a lot!  I also toss in plant prunings and the occasional shredded egg carton.  I use peat moss, newspaper, and coco fiber for a base substrate
.

I got to thinking, if these little red wiggler worms are doing so well for the scraps, how would they do with guinea pig waste, leftover hay, veggies, and cardboard scraps that come out of the cage cleanings?  It would be amazing to not have to take the fleece scraps all the way outside to clean them.  A healthy worm composter works very quickly and efficiently at breaking things down, especially waste, as this is commonly used for rabbits.   It also doesn't stink when maintained properly.  I am fortunate to have a BAZILLION (estimated) red wiggler worms so it was no issue for me to get another vermicompost started.  For the guinea pig cage cleaning, I am using a large storage tote with ventilation holes all around it, and in the bottom for drainage.   It sits on another lid to catch any drainage which is also used as a very rich plant fertilizer.   You would be unlikely to find another fertilizer that could beat the amazing organic fertilizer produced by these worms.

Vermicomposter used for the guinea pig waste.
I have my fleece in the cage in segments, which I have some more detail on over on this post, as well as additional pictures.   I take out each fleece section and sweep it off with a firm bristled brush, that I hang on a hook on the cage stand.   I sweep everything off into the tote made vermicomposter that is full of worms.   They come up and get to work shortly after the "new" waste is added.  I also throw on some shredded junk mail on top and occasionally some excess spoiling fruits or veggies that are too much for my small kitchen vermicompost.

Inside the vermicomposter.
To make things easier, I put my vermicompost up on plant caddies for easy moving on wheels.  This way it can be rolled in and out of a closet or under the cage without much effort for out of sight storage.  It may not be pretty, but it's great for our environment and it makes cleaning so easy!   I save valuable time too, especially not having to bundle up and go outside.
Clean cage!
If you are interested in trying worm composting, I encourage you to do some research in setting up a good functional compost with the right substrate and right kind of worms.  It is important that you have all the right things to make it a successful, productive environment for breaking down waste.  Once you have that down, the rest is a breeze!
Chewy approves of vermicomposting.


Friday, December 12, 2014

The Ornament Making Failure


Let me tell you about the wonderful idea I had last week. With my furry family getting aging more and more each year, I thought it would be a fantastic idea to make pawprint tree ornaments. (Of which I do plan to make an instructional page about once I have it mastered if you'd like to try the same.) I decided I would make 4 little ones for the guinea pigs to start.
I made the dough from equal parts salt and flour, with water added to the right consistency. My husband was super excited about me using a 1/2 cup of our organic salt for this!
I made 4 little balls and patted them out flat. Then I picked up Chewy, Chunky, Chance, and Dan to insert their foot prints. I cut the dough into little shapes, poked a hole at the top for a string, and carved in their names.
I baked these things for THREE HOURS on the lowest heat setting of my oven, flipping them every 30 minutes. I took them out and allowed them to cool a couple hours longer.
The next day I started decorating them with food coloring in the paw prints, a bit of paint for the names, coated them in Elmer's glue, and added a dash of glitter. After they dried, I tied cute little red bows on them, and hung them on the guinea pigs' mini Christmas tree by their cages.
Right after finishing them, I left for an hour with our cat to a vet appointment. I return to find that the tree on the floor and the new ornaments nowhere in sight. Our three dogs have a combined age of 38 years on them - one is blind, one has hardly any teeth, and the other has joint issues. They are usually so well behaved and mellow. This time they look VERY guilty! I find our little toothless fellow still licking on a small piece of one of the ornaments. They were ALL EATEN! Fortunately, the ingredients I used were not toxic and they had no ill effects. All in all, it makes for a good story, no one was injured, and I must find a less tasty way to make these ornaments. Proves you're never too old to get into trouble!  I will try again! Probably with some sort of modeling clay.
This is the only picture I have as evidence to prove the ornaments ever existed:
 

I couldn't help but laugh at the silly dogs since everything turned out alright.   They rarely get themselves in trouble.   Who could be mad at these faces anyway?


Many Updates Including New Cages!

I'm long overdue for an update it appears!   My reason for sharing all of this with you is so that you understand that guinea pig keeping isn't perfect.  They are living creatures with personalities that have ups and downs.   Things can change with their compatibility, health, or other things can come up when you least expect it.   What I want you to take from this, is that it's not all bad!  You roll with it and make the changes needed to make it work (this sometimes takes some attempts to get completely figured out) and then things come out even better in the end.  It will be more enjoyable for you and your guinea pigs, knowing that you can handle any obstacles in the way and improve as a result.  It would be unfair for me to only tell you the great things and post cute pictures and never let you know that bumps in the road occur too.   So here we go with the update!

After Chance recovered from his long illness explained in the prior posts, I waited three months and integrated Chance in with the others.  They had been doing occasional lunch "play dates" to get used to each other before going into the same cage.  I had also been making some small rearranging changes to the cage so it didn't feel exactly the same when Chance was added in mid-October.   Unfortunately a few weeks later, Dan and Chewy, who had been living together all along began to fight.  Sometimes things change with guinea pigs, and it isn't always known why.   Chewy would continue to chase and mount Dan, who would turn around and fight Chewy.  That didn't deter Chewy.   I tried dividing Chewy for a bit and tried reintroducing him, which did not work.  Then I tried putting Dan over the divider for awhile and reintroducing, but that wasn't effective either.   This meant, it was time to update the cages to two permanent cages. I had been considering some new cage ideas for awhile, and this meant the time is now!

In the meantime, Chewy did have some small scabs to heal from his squabbles with Dan.  While monitoring that, I found a small lump on his shoulder.   A vet visit followed, and it was opened up a little bit to determine it was an abscess. Chewy then was put on antibiotics and much of it was cleaned out. There is a deeper capsule that could not be easily gotten to, and the vet feels that if it heals ok, and doesn't get bigger or cause any issues, it may be best to leave that small encapsulated part in there rather than surgery, so long as it doesn't bother him. We are now monitoring that and have a recheck later this month.

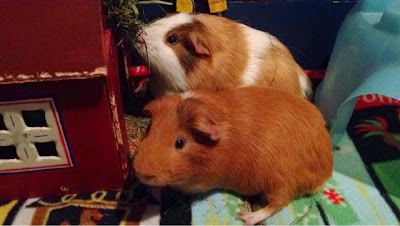
So back to the cage changes!   We decided to do two C&C cages 2 cubes by 5 cubes each.  Our hope was that Chewy and Chunky could live in one, and Chance and Dan in the other, however our attempts did not work.  Chewy started to behave aggressively toward Chunky, so Chewy will remain alone and the other 3 boys will live together in the other cage.

We picked up two new pieces of coroplast - both dark blue and cut them accordingly for our 2x5 cube size.  We also built table like stands to hold each of the cages, one taller than the other so they could overlap. 

A very dear friend made pillow cases out of my fleece for me to stuff pieces of uhaul padding in, along with some coroplast to keep it stiff to make for easy cleaning.  I can remove the insides and wash the fleece and uhaul pads separately.   These are similar to a product called Fleece Flippers - if you haven't heard of them, you should look them up and consider purchasing!  They are very awesome, and in the future I may buy some actual Flippers when the vet expenses calm a bit.  In the meantime, what I have is working fabulously!   No more taking huge pieces of fabric outside and shaking it, and I no longer need an assistant for cage cleaning.  I am just brushing off each individual section at a time into a can and then throwing the fabric in the wash.  Perfect!   I will get into later on another post what I am doing with the guinea pig waste from the cage - another big change that's making winter cage maintenance easier.

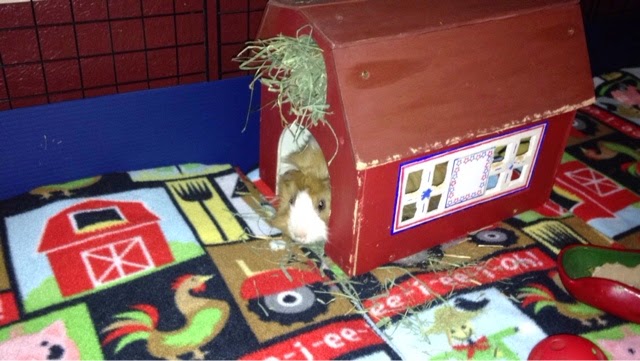
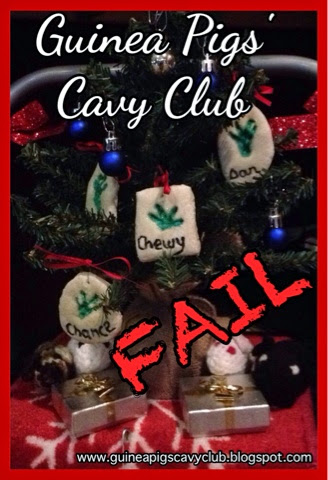
You will notice in the pictures I now have storage under the cage.  I purchased underbed type storage containers to keep their food and clean laundry in, underneat the cage.  I also put up little hooks to store the cage sweeping supplies and water bottle brush.   It works out so much better!  As you can see, we set up their little Christmas tree too.